
فى السنوات الاخيرة, أصبحت الألواح الشمسية ذات شعبية متزايدة بسبب فعاليتها من حيث التكلفة وتأثيرها المنخفض على البيئة. عادةً ما نقوم بتعيين متخصص أو مقاول عام للقيام بالتثبيت, ولكن إذا كنت تعرف عملية تركيب الألواح الشمسية, قد تقرر حتى أن تفعل ذلك بنفسك. ستوضح لك هذه المقالة موعد تركيب الألواح الشمسية والمواد اللازمة لتركيب الألواح الشمسية وترشدك إلى كيفية تركيب الألواح الشمسية, توفر لك حلاً وقفة واحدة.
متى يتم تركيب الألواح الشمسية
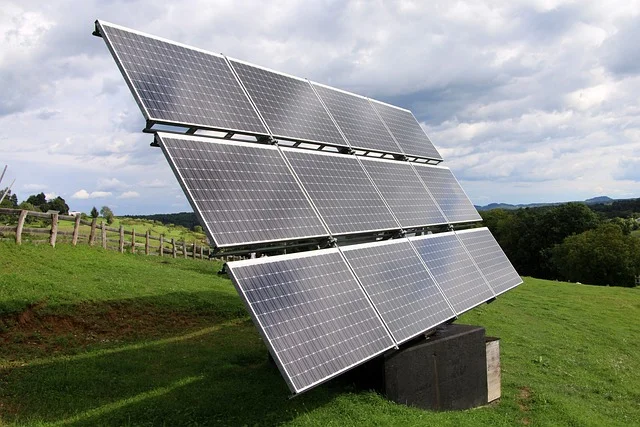
يمكنك تركيب الألواح الشمسية في أي وقت من السنة. لكن, سوف تؤثر الظروف الجوية بشكل عام على عملية التثبيت. إذا هطل المطر, الرياح أو الثلوج, لأسباب تتعلق بالسلامة, يرجى تأخير عملية التثبيت.
كيفية تركيب الألواح الشمسية خطوة بخطوة
من تقييم مدى ملاءمة المنزل واحتياجاته من الطاقة, للامتثال التنظيمي وإجراءات الترخيص, لتصميم النظام واختيار المواد اللازمة لتركيب الألواح الشمسية, نعرض لك خطوة بخطوة كيفية التخطيط, كيفية اختيار المعدات, كيفية تركيب الألواح الشمسية, وكيف يمكنك توصيل الألواح الشمسية بالشبكة. سواء كنت جديدًا في مجال الطاقة الشمسية أو تبحث عن المزيد من المعلومات المهنية المتعمقة, ستعلمك هذه المقالة كيفية تركيب الألواح الشمسية خطوة بخطوة.
خطوة 1: تخطيط تركيب الطاقة الشمسية & أمان
تحديد التوافق
أولاً, تحتاج إلى التحقق من مدى ملاءمة منزلك, التحقق من هيكل السقف, الاتجاه والمساحة الأرضية للتأكد من أنها مناسبة لتركيب الألواح الشمسية. ستحتاج إلى معرفة مقدار ضوء الشمس الذي يتلقاه منزلك مسبقًا على مدار العام. عادةً ما تنتج المناطق التي تتمتع بساعات أطول من أشعة الشمس المزيد من الكهرباء وهي عامل رئيسي في كفاءة الألواح الشمسية.
تقييم احتياجات الطاقة
حدد حجم النظام الشمسي الذي تحتاجه من خلال النظر في متوسط استخدامك للكهرباء خلال العام الماضي وأي تغييرات تتوقعها في المستقبل لتحديد احتياجاتك من الطاقة. يمكنك أيضًا اختيار إنتاج المزيد من الطاقة وبيعها مرة أخرى إلى الموردين لاسترداد الفارق.
حالة السقف
قبل تركيب الألواح الشمسية, تحتاج إلى التأكد من أن السقف الخاص بك في حالة جيدة وأن السقف الخاص بك يتمتع بالسلامة الهيكلية الكافية لتحمل وزن نظام الألواح الشمسية. وعادة ما يتم تقييم ذلك من قبل متخصص.
الحصول على تصاريح
يتضمن تركيب الألواح الشمسية عددًا من المتطلبات القانونية والتنظيمية التي تحتاج إلى فهمها والامتثال لها. بعد التحقق من القوانين واللوائح المحلية, يمكنك البدء في التقدم للحصول على التراخيص ذات الصلة. بشكل عام, يعد انتظار الموافقة على التصريح وعمليات التفتيش اللاحقة عملية تستغرق وقتًا طويلاً.
اعتبارات السلامة
قبل التثبيت, نحن بحاجة إلى النظر في سلسلة من قضايا السلامة, وضمان السلامة أمر بالغ الأهمية. قم بإعداد معدات السلامة وإجراءات الحماية مسبقًا, واتخاذ التدابير المناسبة لمكافحة السقوط عند العمل على المرتفعات. إجراء فحوصات السلامة على المعدات والأنظمة لضمان جميع العمليات والامتثال لمعايير السلامة الصارمة.
خطوة 2: الأدوات والمواد اللازمة لتركيب الألواح الشمسية
تختلف المواد والأدوات اللازمة لتركيب الألواح الشمسية بشكل كبير حسب الاحتياجات والموقع, لذا فإن اختيار المعدات والأدوات المناسبة وعالية الجودة يعد أمرًا أساسيًا لضمان التشغيل الفعال للنظام على المدى الطويل. قبل الشراء, تحتاج إلى إجراء تقييم الأداء وإصدار الشهادات القياسية للمعدات والأدوات, واختيار الشركة المصنعة ذات السمعة الطيبة. أثناء عملية الشراء, لا تحتاج فقط إلى النظر في تكلفة شراء المعدات والأدوات, ولكن أيضًا تكاليف التشغيل والصيانة على المدى الطويل. إن معرفة إعانات وحوافز الطاقة الشمسية المحلية مسبقًا يمكن أن تساعدك أيضًا على تقليل تكاليف الاستثمار.
الأدوات اللازمة لتركيب الألواح الشمسية
- يُسلِّم حفر أو مفك كهربائي
- منشار يدوي أو منشار كهربائي
- أدوات القياس (مثل شريط القياس, مستوى, إلخ.)
- قلم رصاص أو علامة
- كماشة تجريد الأسلاك
- كماشة الأسلاك
- أدوات اللحام (مثل لحام الحديد, لحام, إلخ.)
- قبعة صلبة, القفازات والنظارات الواقية
- سلم أو سقالات
المواد اللازمة لتركيب الألواح الشمسية
- لوحة شمسية
- قوس أو إطار الدعم
- براغي وصواميل تثبيت دعامة اللوحة
- كابل لوحة البطارية
- سلك كهربائي
- موصلات الأسلاك والمقابس
- حزمة البطارية (خياري)
- العاكس (خياري)
- تصاعد بين قوسين ومسامير لحزمة البطارية والعاكس
خطوة 3: عملية التثبيت
تصاعد بين قوسين
حدد الدعامة المناسبة وفقًا للسقف والأرض, ضع الدعامة بدقة للتأكد من تعرض الألواح الشمسية لأشعة الشمس إلى أقصى حد لتحسين كفاءة جمع الطاقة, وقم بتثبيت نظام الدعامة وفقًا للتعليمات بعد القياس ووضع العلامات.
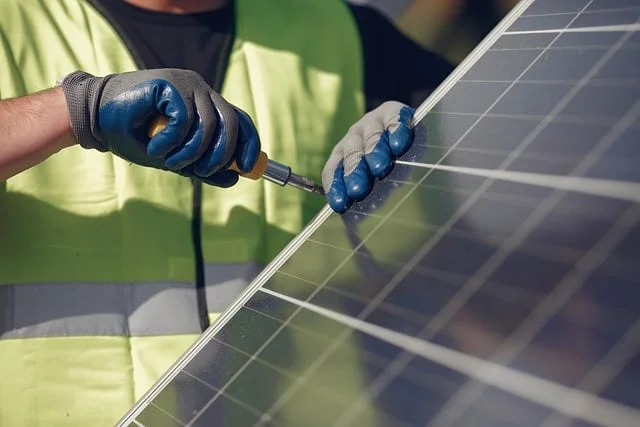
تثبيت لوحة البطارية
أولاً, قم بتركيب اللوحة الشمسية على الحامل وثبتها في مكانها باستخدام التركيبات المناسبة. ثم قم بتوصيل الكابلات بين اللوحات, التأكد من أن التوصيلات آمنة وتلبي المعايير الكهربائية.
تثبيت المبرد
اختر نوع وحجم الرادياتير المناسبين لتثبيته حول الألواح الشمسية. تتمثل وظيفة الرادياتير في الحفاظ على عمل الألواح عند درجة حرارة مناسبة عن طريق تقليل الحرارة الناتجة عن الألواح الشمسية, وبالتالي ضمان التشغيل المستقر للنظام على المدى الطويل.
تثبيت جهاز التحكم بالشحن
التالي, تثبيت جهاز التحكم بالشحن. يتمثل دور جهاز التحكم في الشحن في إدارة تدفق الكهرباء المولدة من الألواح الشمسية وإجراء التوصيلات الكهربائية. تحتاج إلى تثبيت جهاز التحكم بالشحن بين اللوحة الشمسية وحزمة البطارية, ويمكنك تعيين المعلمات لمنع الشحن الزائد والتفريغ الزائد.
قم بتثبيت حزمة البطارية
تعد حزم البطاريات مكونًا رئيسيًا في تخزين الكهرباء المولدة بواسطة الألواح الشمسية ويمكنها تخزين الكهرباء الزائدة المولدة. قم بتثبيته في مكان مناسب وربطه بوحدة التحكم في الشحن. أنت بحاجة إلى التأكد من أن مجموعة البطارية مؤمنة بشكل آمن وجيدة التهوية لمنع ارتفاع درجة الحرارة.
خطوة 4: كيف يمكنك توصيل الألواح الشمسية
تركيب العاكس
لأن الطاقة من الألواح الشمسية والبطاريات هي تيار مباشر, يجب تحويله إلى تيار متردد قبل استخدامه في الأسلاك المنزلية. لذلك, تحتاج إلى تثبيت عاكس الطاقة. عادة ما يتم تركيب العاكسات بالقرب من الألواح الشمسية وبنوك البطاريات لتقليل خسائر نقل الطاقة. أيضًا, اختر موقعًا أقرب إلى مجموعة البطارية ونقطة الوصول إلى الطاقة لزيادة كفاءة النظام عن طريق تقليل طول الكابل. يجب أن يكون موقع التثبيت بعيدًا عن البيئات الرطبة وارتفاع درجة الحرارة قدر الإمكان لضمان التشغيل الطبيعي وعمر العاكس.
تثبيت العداد
يقع جهاز القياس عادةً بالقرب من العاكس ونقطة الوصول إلى الطاقة. بعد تركيب العداد, يتم تحديد معلماته ومعايرته لضمان القياس الدقيق للطاقة التي يولدها النظام.
التوصيلات الكهربائية
تحديد نقاط الاتصال الصحيحة, عادة ما تتعلق بالعاكس, بنك البطارية والعداد. ثم اتبع التعليمات لتوصيل كابلات التيار المستمر والتيار المتردد بشكل صحيح للتأكد من أن التوصيل الكهربائي يتوافق مع معايير ولوائح السلامة. أخيراً, يتم إجراء اختبار كهربائي شامل لضمان التوصيلات المناسبة بين المكونات المختلفة للنظام, وفي النهاية ضمان التشغيل الفعال للنظام الشمسي.
خطوة 5: الصيانة والإعانات
صيانة الألواح الشمسية
صيانة الألواح الشمسية بسيطة للغاية. كل ما عليك فعله هو تنظيف سطح اللوحة بانتظام والتحقق من الكابلات والتوصيلات للتأكد من أنها تعمل بشكل صحيح.
وتختلف الحوافز من مكان إلى آخر, تحقيق أقصى استفادة من استثمارك في الطاقة الشمسية. قبل أن تبدأ التثبيت, يمكنك استكشاف هذه الحوافز وقد تتمكن من الحصول على إعفاءات ضريبية, الحسومات, أو المنح من مصادر متعددة لتعويض التكاليف. إجمالي, يتيح ذلك تمويل مشروعك عن طريق القرض. فضلاً عن ذلك, تحتاج أيضًا إلى التعرف على إعانات السياسة المحلية لتوفير الدعم المالي لبناء وصيانة نظامك الشمسي.
خاتمة
يعد تركيب الألواح الشمسية قرارًا مستدامًا لا يساهم بشكل إيجابي في الحفاظ على البيئة فحسب, ولكنه أيضًا استثمار مجدٍ ماليًا. باتباع الخطوات والنصائح الواردة في هذا الدليل النهائي, لقد تعلمت عن المواد اللازمة لتركيب الألواح الشمسية, وكذلك كيفية توصيل الألواح الشمسية وكيفية تركيب الألواح الشمسية لتحقيق أقصى استفادة من الطاقة الشمسية.
إذا شعرت بالحاجة أو واجهت تحديات تقنية, نوصي بالبحث عن خدمات تركيب الطاقة الشمسية الاحترافية. تقدم GYCX Solar مجموعة شاملة من منتجات الطاقة الشمسية, التوجيه الشخصي, و خدمة ممتازة لمساعدتك في العثور على الحل الشمسي المناسب لاحتياجات عملك. اتصل بنا اليوم لمعرفة المزيد عن منتجاتنا الشمسية وكيف يمكننا مساعدة عملك على الازدهار باستخدام الطاقة المتجددة.

الأسئلة الشائعة حول تركيب الألواح الشمسية
كيف تعمل الألواح الشمسية?
تمتص الألواح الشمسية الطاقة الشمسية طوال اليوم وتحولها إلى تيار مباشر. يعمل على أساس التأثير الكهروضوئي, وتعمل معظم المنازل والشركات بالتيار المتردد (تكييف), الأمر الذي يتطلب عاكسًا لتحويل طاقة التيار المستمر إلى طاقة تيار متردد قابلة للاستخدام.
هل ستولد الألواح الشمسية الكهرباء عندما لا يكون هناك ضوء الشمس؟?
تعتمد كمية الكهرباء التي تنتجها الألواح الشمسية على ضوء الشمس, وعندما لا يكون هناك ضوء الشمس خلال النهار, سوف تنتج الألواح الشمسية الخاصة بك طاقة أقل. لحل هذه المشكلة, تم تجهيز أنظمة الطاقة الشمسية بحزم بطاريات يمكنها تخزين الطاقة الكهربائية. قم بتخزين الطاقة الكهربائية الزائدة في البطارية وتزويدها للنظام في حالة عدم وجود ضوء الشمس.
إذا كان لدي الألواح الشمسية, هل سأظل أتلقى فاتورة الكهرباء؟?
ستظل لديك فاتورة كهرباء, ولكن مع نظام الألواح الشمسية, يمكن تخفيض فاتورة الطاقة الخاصة بك بشكل كبير.
هل تعمل الألواح الشمسية أثناء انقطاع التيار الكهربائي؟?
إذا كان نظام الألواح الشمسية الخاص بك متصلاً بالشبكة, سيتم إيقاف تشغيله أثناء انقطاع التيار الكهربائي. هناك محولات معينة يمكنك شراؤها لتوفير طاقة احتياطية في حالة انقطاع التيار الكهربائي.
كم تبلغ تكلفة صيانة الألواح الشمسية؟?
تعتبر الألواح الشمسية منخفضة الصيانة نسبيًا وتتطلب عمومًا القليل من الصيانة 25 ل 35 سنوات من توليد الكهرباء. تعتمد تكاليف الصيانة المحددة على حجم نظامك وتكوينه, لذلك يوصى بالاتصال بمركب نظام الطاقة الشمسية أو مزود خدمة الصيانة مسبقًا للحصول على تقدير دقيق للتكلفة.
ماذا يحدث إذا كان هناك ثلج على الألواح الشمسية؟?
إذا كانت الألواح الخاصة بك مغطاة بالثلج, لن تتمكن الألواح الشمسية الخاصة بك من جمع ضوء الشمس, لذلك لن يتمكنوا من توليد الكهرباء. والحقيقة هي أن معظم الألواح مائلة بزاوية حيث ينزلق الثلج, وإذا تراكمت الثلوج, سوف تحتاج إلى تنظيف الألواح الخاصة بك.
كيفية تركيب الألواح الشمسية خطوة بخطوة?
يوضح دليلنا خطوة بخطوة كيفية تركيب الألواح الشمسية. ال 10 الخطوات هي كما يلي: خطط للمشروع, تثبيت نظام الرفوف, تثبيت الألواح الشمسية, تثبيت المبرد, تثبيت جهاز التحكم بالشحن, قم بتثبيت البطارية, تثبيت العاكس. تركيب عداد الطاقة. إعداد الأسلاك الكهربائية والفحص الكامل. قم بتوصيل لوحة التبديل بشبكة الطاقة.