In den vergangenen Jahren, Solarmodule erfreuen sich aufgrund ihrer Kosteneffizienz und geringen Umweltbelastung immer größerer Beliebtheit. Typischerweise beauftragen wir mit der Installation einen Spezialisten oder Generalunternehmer, Aber wenn Sie den Prozess der Installation von Solarmodulen kennen, Vielleicht entscheiden Sie sich sogar dafür, es selbst zu tun. In diesem Artikel erfahren Sie, wann Sie Solarmodule installieren müssen, welche Materialien für die Installation von Solarmodulen erforderlich sind und wie Sie Solarmodule installieren, Wir bieten Ihnen eine Lösung aus einer Hand.

Wann sollten Solarmodule installiert werden?
Sie können zu jeder Jahreszeit Solarmodule installieren. Jedoch, Die Wetterbedingungen wirken sich im Allgemeinen auf den Installationsprozess aus. Wenn es regnet, Wind oder Schnee, aus Sicherheitsgründen, Bitte verzögern Sie den Installationsvorgang.
So installieren Sie Solarmodule Schritt für Schritt
Von der Beurteilung der Hauseignung und des Energiebedarfs, zur Einhaltung gesetzlicher Vorschriften und zu Lizenzierungsverfahren, zum Systemdesign und zur Auswahl der für die Installation von Solarmodulen erforderlichen Materialien, Wir zeigen Ihnen Schritt für Schritt, wie Sie planen, wie man die Ausrüstung auswählt, wie man Sonnenkollektoren installiert, und wie verkabelt man Solarmodule mit dem Stromnetz?. Egal, ob Sie neu in der Solarenergie sind oder tiefergehende Fachinformationen suchen, In diesem Artikel erfahren Sie Schritt für Schritt, wie Sie Solarmodule installieren.
Schritt 1: Solarinstallationsplanung & Sicherheit
Kompatibilität ermitteln
Erstens, Sie müssen die Eignung Ihres Hauses prüfen, Überprüfung der Dachkonstruktion, Achten Sie auf Ausrichtung und Bodenfläche, um sicherzustellen, dass sie für die Installation von Solarmodulen geeignet ist. Sie möchten im Voraus wissen, wie viel Sonnenlicht Ihr Zuhause das ganze Jahr über erhält. Gebiete mit längeren Sonnenstunden produzieren in der Regel mehr Strom und sind ein Schlüsselfaktor für die Effizienz von Solarmodulen.
Bewerten Sie den Energiebedarf
Bestimmen Sie die Größe der Solaranlage, die Sie benötigen, indem Sie Ihren durchschnittlichen Stromverbrauch im vergangenen Jahr und alle Änderungen, die Sie in der Zukunft erwarten, berücksichtigen, um Ihren Energiebedarf zu ermitteln. Sie können sich auch dafür entscheiden, mehr Energie zu erzeugen und diese an die Lieferanten zurückzuverkaufen, um die Differenz zurückzuerhalten.
Dachzustand
Vor der Installation von Solarmodulen, Sie müssen sicherstellen, dass Ihr Dach in gutem Zustand ist und dass Ihr Dach über eine ausreichende strukturelle Stabilität verfügt, um das Gewicht des Solarpanelsystems zu tragen. Dies wird in der Regel von einem Fachmann beurteilt.
Holen Sie sich Genehmigungen
Die Installation von Solarmodulen erfordert eine Reihe gesetzlicher und behördlicher Anforderungen, die Sie verstehen und einhalten müssen. Nach Überprüfung der örtlichen Gesetze und Vorschriften, Sie können mit der Beantragung entsprechender Lizenzen beginnen. Allgemein gesagt, Das Warten auf die Genehmigung und anschließende Inspektionen ist ein zeitaufwändiger Prozess.
Sicherheitsüberlegungen
Vor der Installation, Wir müssen eine Reihe von Sicherheitsaspekten berücksichtigen, und die Gewährleistung der Sicherheit ist von entscheidender Bedeutung. Bereiten Sie Sicherheitsausrüstung und Schutzmaßnahmen im Voraus vor, und treffen Sie bei Arbeiten in der Höhe geeignete Absturzsicherungsmaßnahmen. Führen Sie Sicherheitsüberprüfungen an Geräten und Systemen durch, um den gesamten Betrieb und die Einhaltung strenger Sicherheitsstandards sicherzustellen.
Schritt 2: Benötigte Werkzeuge und Materialien für die Installation von Solarmodulen
Die für die Installation von Solarmodulen erforderlichen Materialien und Werkzeuge variieren stark je nach Bedarf und Standort, Daher ist die Auswahl der richtigen und hochwertigen Geräte und Werkzeuge von entscheidender Bedeutung, um den langfristig effizienten Betrieb der Anlage sicherzustellen. Vor dem Kauf, Sie müssen eine Leistungsbewertung und Standardzertifizierung von Geräten und Werkzeugen durchführen, und wählen Sie einen renommierten Hersteller. Während des Kaufvorgangs, Sie müssen nicht nur die Anschaffungskosten der Ausrüstung und Werkzeuge berücksichtigen, sondern auch die langfristigen Betriebs- und Wartungskosten. Wenn Sie sich im Voraus über örtliche Solarförderungen und -anreize informieren, können Sie auch Ihre Investitionskosten senken.
Benötigte Werkzeuge für die Installation von Solarmodulen
- Hand bohren oder Elektroschrauber
- Handsäge oder Elektrosäge
- Messwerkzeuge (wie zum Beispiel ein Maßband, Ebene, usw.)
- Bleistift oder Marker
- Abisolierzange
- Drahtzange
- Schweißwerkzeuge (wie zum Beispiel Schweißeisen, Lot, usw.)
- Schutzhelm, Handschuhe und Schutzbrille
- Leiter oder Gerüst
Benötigte Materialien für die Installation von Solarmodulen
- Solarpanel
- Halterung oder Stützrahmen
- Befestigungsschrauben und Muttern für die Plattenhalterung
- Batterieplatinenkabel
- Kabel
- Kabelverbinder und Stecker
- Akkupack (Optional)
- Wandler (Optional)
- Montagehalterungen und Schrauben für Batteriepack und Wechselrichter

Schritt 3: Installationsprozess
Montagehalterungen
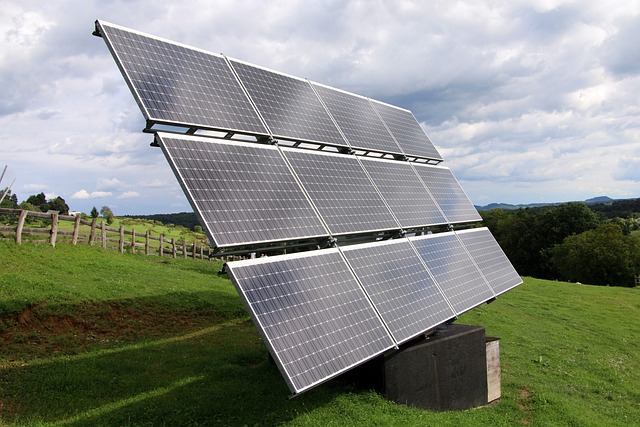
Wählen Sie je nach Dach und Untergrund die passende Halterung aus, Positionieren Sie die Halterung genau, um sicherzustellen, dass Ihre Solarmodule der größtmöglichen Sonneneinstrahlung ausgesetzt sind, um die Effizienz der Energiegewinnung zu verbessern, und installieren Sie das Halterungssystem gemäß den Anweisungen nach dem Ausmessen und Markieren.
Batteriepanel einbauen
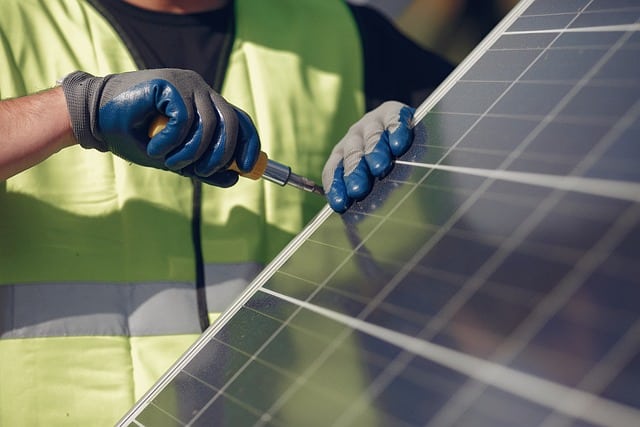
Erste, Montieren Sie das Solarpanel auf der Halterung und befestigen Sie es mit geeigneten Vorrichtungen. Anschließend verbinden Sie die Kabel zwischen den Paneelen, Stellen Sie sicher, dass die Verbindungen sicher sind und den elektrischen Standards entsprechen.
Kühler einbauen
Wählen Sie den richtigen Heizkörpertyp und die richtige Größe für die Installation rund um Ihre Solarmodule. Die Funktion des Heizkörpers besteht darin, die Solarmodule auf einer geeigneten Temperatur zu halten, indem er die von den Solarmodulen erzeugte Wärme reduziert, Dadurch wird ein langfristig stabiler Betrieb des Systems gewährleistet.
Laderegler einbauen
Nächste, Installieren Sie den Laderegler. Die Aufgabe des Ladereglers besteht darin, den von den Solarmodulen erzeugten Stromfluss zu steuern und die elektrischen Verbindungen herzustellen. Sie müssen den Laderegler zwischen dem Solarpanel und dem Akkupack installieren, und Sie können Parameter einstellen, um Überladung und Tiefentladung zu verhindern.
Akkupack einbauen
Batteriepacks sind eine Schlüsselkomponente bei der Speicherung des von Solarmodulen erzeugten Stroms und können überschüssigen erzeugten Strom speichern. Installieren Sie es an einem geeigneten Ort und verbinden Sie es mit dem Laderegler. Sie müssen sicherstellen, dass der Akku sicher befestigt und gut belüftet ist, um eine Überhitzung zu verhindern.
Schritt 4: Wie verkabelt man Solarmodule?
Wechselrichterinstallation
Denn der Strom aus Sonnenkollektoren und Batterien ist Gleichstrom, Es muss in Wechselstrom umgewandelt werden, bevor es in der Hausverkabelung verwendet werden kann. daher, Sie müssen einen Wechselrichter installieren. Wechselrichter werden normalerweise in der Nähe von Solarmodulen und Batteriebänken installiert, um Verluste bei der Stromübertragung zu reduzieren. Auch, Wählen Sie einen Standort näher am Akku und Stromzugangspunkt, um die Systemeffizienz durch Reduzierung der Kabellänge zu steigern. Der Installationsort sollte so weit wie möglich von feuchten Umgebungen mit hohen Temperaturen entfernt sein, um den normalen Betrieb und die Lebensdauer des Wechselrichters zu gewährleisten.
Messgerät installieren
Der Zähler befindet sich normalerweise in der Nähe des Wechselrichters und des Stromzugangspunkts. Nachdem das Messgerät installiert ist, Es ist parametrisiert und kalibriert, um eine genaue Messung der vom System erzeugten Leistung zu gewährleisten.
Elektrische Anschlüsse
Bestimmen Sie die richtigen Verbindungspunkte, hängt normalerweise mit dem Wechselrichter zusammen, Batteriebank und Messgerät. Befolgen Sie dann die Anweisungen zum korrekten Anschluss der Gleich- und Wechselstromkabel, um sicherzustellen, dass der elektrische Anschluss den Sicherheitsstandards und -vorschriften entspricht. Endlich, Es werden umfassende elektrische Tests durchgeführt, um ordnungsgemäße Verbindungen zwischen den verschiedenen Komponenten des Systems sicherzustellen, und letztlich einen effizienten Betrieb der Solaranlage gewährleisten.
Schritt 5: Wartung und Subventionen
Wartung von Solarmodulen
Die Wartung von Solarmodulen ist sehr einfach. Sie müssen lediglich die Oberfläche des Panels regelmäßig reinigen und die Kabel und Anschlüsse überprüfen, um sicherzustellen, dass sie ordnungsgemäß funktionieren.
Die Anreize variieren von Ort zu Ort, Machen Sie das Beste aus Ihrer Solarinvestition. Bevor Sie mit der Installation beginnen, Sie können diese Anreize erkunden und möglicherweise Steuergutschriften erhalten, Rabatten, oder Zuschüsse aus mehreren Quellen, um die Kosten auszugleichen. Gesamt, Dies ermöglicht die Finanzierung Ihres Projekts durch ein Darlehen. Zusätzlich, Sie müssen sich auch über lokale politische Zuschüsse informieren, um den Bau und die Wartung Ihrer Solaranlage finanziell zu unterstützen.
Abschluss
Die Installation von Solarmodulen ist eine nachhaltige Entscheidung, die nicht nur einen positiven Beitrag zur Umwelt leistet, sondern ist auch eine finanziell lohnende Investition. Indem Sie die Schritte und Ratschläge in diesem ultimativen Leitfaden befolgen, Sie haben etwas über die Materialien erfahren, die für die Installation von Solarmodulen benötigt werden, Außerdem erfahren Sie, wie Sie Solarmodule verkabeln und installieren, um Ihre Solarenergie optimal zu nutzen.
Wenn Sie das Bedürfnis verspüren oder auf technische Herausforderungen stoßen, Wir empfehlen Ihnen, professionelle Solarinstallationsdienste in Anspruch zu nehmen. GYCX Solar bietet ein umfassendes Sortiment an Solarprodukten, individuelle Beratung, Und ausgezeichneter Service um Ihnen dabei zu helfen, die richtige Solarlösung für Ihre Geschäftsanforderungen zu finden. Kontaktiere uns Erfahren Sie noch heute mehr über unsere Solarprodukte und wie wir Ihrem Unternehmen mit erneuerbarer Energie zum Erfolg verhelfen können.

Häufig gestellte Fragen zur Installation von Solarmodulen
Wie funktionieren Sonnenkollektoren??
Sonnenkollektoren absorbieren den ganzen Tag über Sonnenenergie und wandeln sie in Gleichstrom um. Es funktioniert auf Basis des photovoltaischen Effekts, und die meisten Haushalte und Unternehmen werden mit Wechselstrom betrieben (Wechselstrom), Dazu ist ein Wechselrichter erforderlich, der den Gleichstrom in nutzbaren Wechselstrom umwandelt.
Werden meine Solarmodule Strom erzeugen, wenn kein Sonnenlicht vorhanden ist??
Die von Solarmodulen erzeugte Strommenge hängt vom Sonnenlicht ab, und wenn es tagsüber kein Sonnenlicht gibt, Ihre Solarmodule produzieren weniger Energie. Um dieses Problem zu lösen, Solaranlagen sind mit Batteriepacks ausgestattet, die elektrische Energie speichern können. Speichern Sie überschüssige elektrische Energie in der Batterie und versorgen Sie das System mit dieser, wenn kein Sonnenlicht vorhanden ist.
Wenn ich Sonnenkollektoren habe, Bekomme ich trotzdem eine Stromrechnung??
Sie haben weiterhin eine Stromrechnung, aber mit einer Solaranlage, Ihre Energierechnung kann erheblich gesenkt werden.
Funktionieren Sonnenkollektoren während eines Stromausfalls??
Wenn Ihre Solaranlage an das Stromnetz angeschlossen ist, Bei einem Stromausfall schaltet es sich ab. Es gibt bestimmte Wechselrichter, die Sie kaufen können, um bei einem Stromausfall Notstrom bereitzustellen.
Wie viel kostet die Wartung von Solarmodulen??
Solarmodule sind relativ wartungsarm und benötigen im Allgemeinen nur wenig Wartung 25 Zu 35 Jahre der Stromerzeugung. Die spezifischen Wartungskosten hängen von der Größe und Konfiguration Ihrer Anlage ab, Daher wird empfohlen, dass Sie sich vorab an Ihren Solaranlageninstallateur oder Wartungsdienstleister wenden, um einen genauen Kostenvoranschlag zu erhalten.
Was passiert, wenn Schnee auf den Solarmodulen liegt??
Wenn Ihre Paneele mit Schnee bedeckt sind, Ihre Sonnenkollektoren können kein Sonnenlicht sammeln, Sie können also keinen Strom erzeugen. Die Realität ist, dass die meisten Platten in einem Winkel geneigt sind, von dem der Schnee abrutscht, und wenn sich Schnee ansammelt, Sie müssen Ihre Paneele reinigen.
So installieren Sie Solarmodule Schritt für Schritt?
In unserer Schritt-für-Schritt-Anleitung erfahren Sie, wie Sie Solarmodule installieren. Der 10 Die Schritte sind wie folgt: Planen Sie das Projekt, Installieren Sie das Regalsystem, Installieren Sie die Sonnenkollektoren, den Kühler einbauen, Installieren Sie den Laderegler, Installieren Sie die Batterie, Installieren Sie den Wechselrichter. Installieren Sie einen Energiezähler. Elektrische Verkabelung einrichten und Inspektion durchführen. Schließen Sie die Schaltanlage an das Stromnetz an.
