랙 마운트는 어떻게 작동합니까??

랙 마운트는 어떻게 작동합니까??
Have you ever peered into an IT closet or data center and marveled at how neatly all the complex equipment – servers, 네트워크 스위치, and power supplies – is organized? Or perhaps you’re looking into robust energy storage solutions like "rack mount batteries" and wondering how they fit into this efficient system. The magic behind this organization is the rack mount system, a standardized approach that offers immense benefits.

Rack mounting works by using a standardized 19-inch wide frame (the equipment rack) equipped with vertical mounting rails. Equipment specifically designed for rack mounting, such as servers, 네트워크 장비, or modern "rack mount batteries," has a front panel also 19 inches wide with mounting holes. These devices are then secured to the rails using screws and often supported by specialized rail kits that slide into the rack to bear the weight. This system allows for dense, 조직, and accessible housing of critical components, with equipment height measured in standardized "U" 단위.

Image of a well-organized server rack filled with various equipment including a rack mount battery or UPS, highlighting the neatness and density.
Organized Rack Mount System

~에 Gycx 솔라, we frequently utilize rack mount solutions, especially for our scalable Lithium Iron Phosphate (LFP) battery systems. Understanding how rack mounting works helps appreciate the efficiency, 안전, and modularity it brings to complex setups, including advanced solar energy storage. Let’s explore this system in more detail.

What are server rack batteries?

You’ve heard about rack mounting, and now "server rack batteries." Are these just regular batteries put on a shelf, or are they something more specialized? When we talk about modern energy storage, server rack batteries are indeed a purpose-built solution.

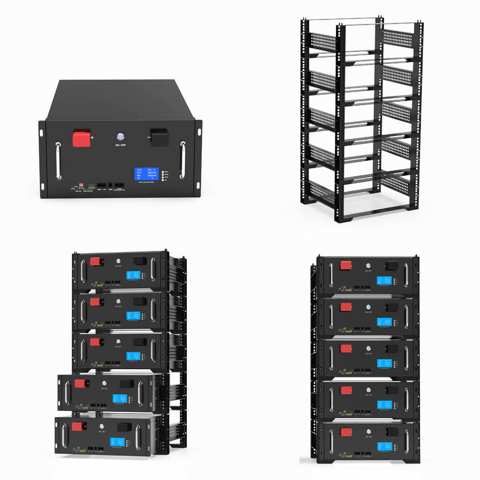
Server rack batteries are lithium-ion battery modules, most commonly utilizing Lithium Iron Phosphate (LFP) chemistry for its excellent safety and long cycle life, specifically designed to fit into standard 19-inch equipment racks. They are modular, meaning you can often "stack" or install multiple units to scale your energy storage capacity. Each module typically includes its own integrated Battery Management System (비엠에스) for protection and monitoring, and they offer a very space-efficient and organized solution for applications like solar energy storage, backup power systems, and off-grid energy independence.

Close-up shot of a couple of LFP server rack battery modules, perhaps showing their front panel with connectors or status lights.
LFP Server Rack Battery Modules

더 깊이 다이빙하십시오: The Anatomy of a Rack Mount Battery

Server rack batteries are engineered for performance and integration within a racked environment:

  • Standardized Form Factor: They adhere to the 19-inch width standard, allowing them to be installed in the same racks as IT servers, 네트워크 스위치, and UPS units. Their height is measured in "U" 단위 (1U = 1.75 신장), commonly ranging from 2U to 5U per module.
  • LFP Chemistry (일반적으로): As we at Gycx Solar often emphasize for stationary storage, LFP (LiFePO₄) is the go-to chemistry due to its inherent safety (high thermal stability, 열 런 어웨이가 덜 발생합니다), very long cycle life (thousands of charge/discharge cycles), and because it doesn’t contain cobalt, addressing some ethical sourcing concerns.
  • Modularity and Scalability: This is a huge advantage. You can start with one or two modules and easily add more in parallel later to increase your total energy storage capacity (kWh) as your needs grow, without having to replace the entire system.
  • 통합 배터리 관리 시스템 (비엠에스): Each module typically houses its own intelligent BMS. This critical component protects the battery cells from overcharge, 과잉 담당, 과전류, 극한 온도. It also performs cell balancing (vital for LFP health and longevity) and communicates status information to the inverter or system controller.
  • 응용: Perfect for residential solar + 저장, 상업용 에너지 저장, off-grid cabins or facilities, and providing robust backup power. Their ability to be neatly contained and scaled makes them very versatile.
  • Benefits in a Rack: Installing these batteries in a rack means high energy density in a small footprint, organized cabling, and often better thermal management as the modules and racks are designed with airflow in mind.

What is the function of rack mount?

Why bother with racks at all? What’s the fundamental purpose behind this standardized system of mounting equipment? The functions of a rack mount system are all geared towards efficiency, 조직, security, and scalability for critical electronic systems.

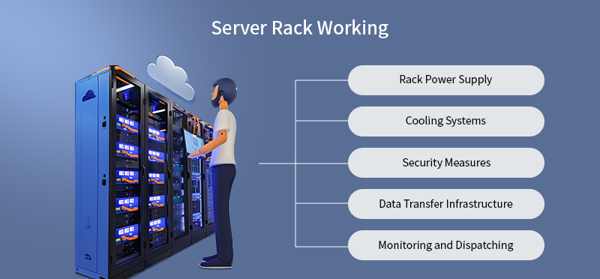
The primary function of a rack mount system is to provide a standardized, space-efficient, 안전한, and organized framework for housing multiple pieces of electronic equipment. This includes devices like servers, 네트워크 스위치, 라우터, 패치 패널, Uninterruptible Power Supplies (UPS), 그리고, increasingly, rack mount battery systems for energy storage. By doing so, it improves airflow for cooling, simplifies cable management, enhances physical security, and makes equipment more accessible for maintenance and upgrades.

An empty 4-post server rack, perhaps with arrows indicating airflow and cable management zones.
Functions and Benefits of an Equipment Rack

더 깊이 다이빙하십시오: The Advantages of a Standardized Framework

Let’s break down the key functions and benefits of using equipment racks:

  • 표준화 (EIA-310): The widely adopted EIA-310 standard dictates the 19-inch width for equipment panels and the "U" unit for height. This ensures that equipment from different manufacturers can generally fit into any standard rack, promoting interoperability and choice.
  • 공간 최적화: Racks allow you to utilize vertical space incredibly efficiently. Instead of valuable equipment sprawling across a room, it’s neatly stacked, maximizing component density in a minimal footprint. This is crucial in data centers, IT closets, and even for compact energy storage setups.
  • Organization and Cable Management: A racked environment encourages (and often provides features for) systematic organization. Equipment is centralized, and with accessories like cable managers, 패치 패널, and thoughtful routing, power and data cables can be kept tidy, labeled, 그리고 방해. This drastically reduces clutter, improves airflow, and simplifies troubleshooting.
  • Improved Airflow and Cooling: Most racks and rack-mounted equipment are designed for specific airflow patterns (often front-to-back or bottom-to-top). Proper racking ensures these pathways are maintained, helping to keep sensitive electronics cool and extending their operational life. Blanking panels are used to cover empty U-spaces to prevent hot and cold air from mixing inefficiently.
  • 향상된 보안: Many racks are available as lockable cabinets with solid or perforated doors and side panels. This provides physical security, preventing unauthorized access to valuable servers, 네트워크 장비, UPS1. 단위, or battery systems.
  • Scalability and Accessibility: As needs grow, it’s generally straightforward to add more equipment to available U-space or even add more racks. Features like sliding rails on servers and some UPS/battery units allow for easier access to the rear of the equipment for maintenance or component replacement without having to fully un-mount them.

I’ve seen firsthand in our Gycx Solar installations how a well-planned rack for an inverter, battery modules, and monitoring gear can make a complex system look incredibly professional and be much easier to service down the line.

How to setup a rack mount?

Planning to set up your own equipment rack, perhaps for a home lab, a small business IT closet, or even for a robust rack mount battery system? A methodical approach to the setup process will ensure safety, stability, and optimal performance for all your gear.

Setting up a rack mount generally involves these key steps:

  1. Planning the Layout: Decide where each piece of equipment will go, placing heavier items like UPS units and large batteries at the bottom for stability.
  2. Anchoring the Rack (if necessary): For safety, especially with heavy loads, securely bolt the rack to the floor and/or wall.
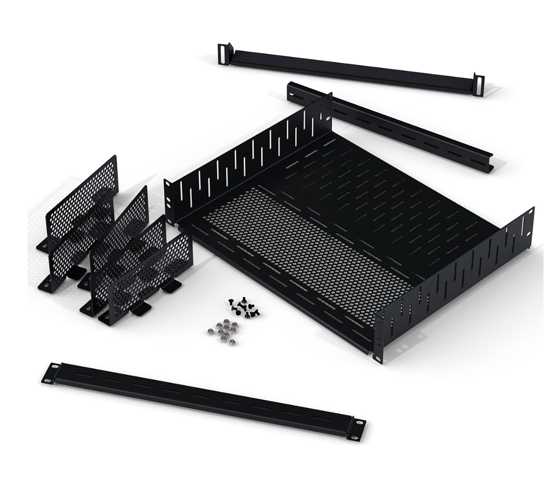
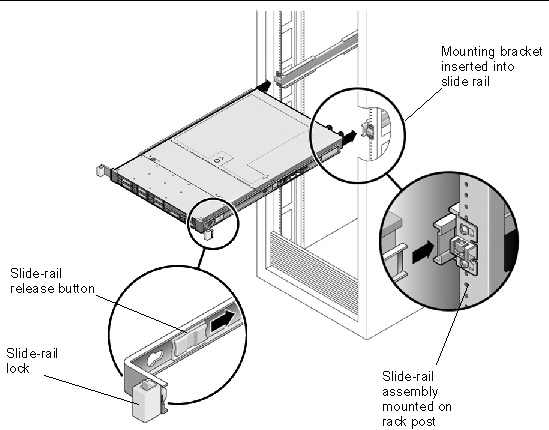
  3. Installing Rail Kits: Attach the appropriate rail kits (fixed or sliding) for each piece of equipment to the rack’s vertical posts.
  4. Mounting the Equipment: Carefully slide or lift equipment onto the rails and secure it with screws.
  5. Managing Cables: Route power and data cables neatly using cable managers and ties.
  6. Ensuring Proper Airflow and Power Distribution: Install blanking panels in empty spaces and connect devices to a Power Distribution Unit (PDU) 필요한 경우.

Step-by-step infographic: 1. Plan, 2. Anchor Rack, 3. Install Rails, 4. Mount Gear, 5. Cable Manage, 6. Airflow/Power.
Steps to Setting Up a Rack Mount

더 깊이 다이빙하십시오: A Methodical Approach to Rack Installation

Let’s elaborate on these setup steps:

  • 안전 제일 & Preparation:
    • Anchoring: As discussed previously, if your rack will hold significant weight (like multiple server rack batteries or UPS units), it ~ 해야 하다 be securely anchored to the floor and/or wall to prevent tipping. This is a critical safety measure.
    • Safe Lifting: Have help available for heavy items. Use proper lifting techniques.
    • 도구: Gather necessary tools: screwdriver set, cage nut tool (if using square hole racks), 수준, measuring tape, appropriate drill and bits if anchoring.
  • Planning Your Layout:
    • 체중 분포: Always install the heaviest components (UPS, large batteries, dense servers) at the bottom of the rack. This lowers the center of gravity.
    • Airflow Strategy: Understand how your equipment draws in cool air and expels hot air. Plan placement to optimize this, ensuring vents are not blocked.
    • Accessibility: Think about which components you might need to access most frequently.
  • Rail Kit Installation: Each piece of rack-mountable equipment usually comes with its own rail kit or has specific compatible options. Follow the manufacturer’s instructions precisely for installing these rails onto the vertical posts of your rack. Ensure they are level and securely fastened at the correct depth.
  • Mounting Equipment: With rails in place, carefully slide or lift the equipment into the rack. For heavy items, this is often a two-person job. Once in position, secure the front panel of the equipment to the rack rails with the appropriate screws (or cage nuts and screws).
  • Cable Management: This is crucial for a clean setup and good airflow.
    • Use rack-mounted Power Distribution Units (PDUs) for power outlets.
    • Route cables neatly along the sides or back of the rack using vertical and horizontal cable managers, Velcro straps, or zip ties (not too tight!).
    • Separate power cables from data cables where possible to minimize interference.
    • Label cables at both ends.
  • Grounding: Ensure the equipment rack itself and all mounted devices are properly grounded according to electrical codes for safety.
  • Optimizing Airflow: Install blanking panels in any unused U-spaces. This prevents hot exhaust air from recirculating back to the front air intakes of your equipment, improving cooling efficiency.

Taking your time and planning carefully will result in a professional, safe, and easy-to-manage rack setup.

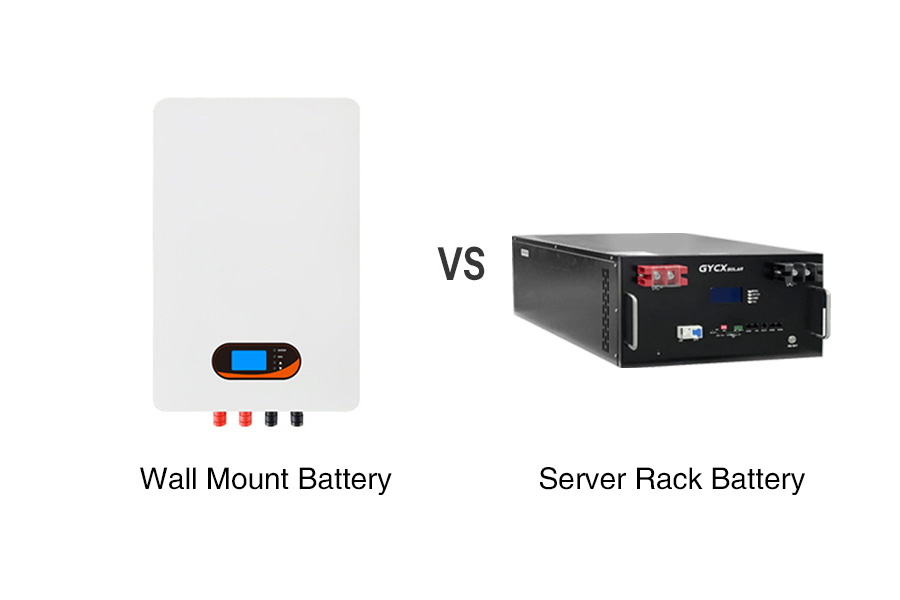
Which is better wall mount or server rack batteries?

When it comes to deploying lithium battery energy storage, especially for residential or light commercial applications, you’ll often encounter two main physical forms: sleek, all-in-one wall mount batteries and more industrial-looking server rack batteries (which are then typically housed in a cabinet or rack). 그래서, which one is the "better" choice for you?

Neither is universally "better"; the ideal choice depends on your specific needs, 공간, capacity requirements, budget, 미적 취향과. Wall mount batteries (like the Tesla Powerwall or Enphase Encharge) are often favored for their integrated design and residential appeal, offering a specific capacity in an aesthetically pleasing package. Server rack batteries provide excellent modularity, high energy density within a rack footprint, and are often more cost-effective and flexible for building larger or more customized systems, making them great for those needing scalability or integrating into existing rack infrastructure.

Side-by-side comparison: a sleek wall-mounted home battery unit (like a Powerwall) vs. a stack of server rack batteries in a small cabinet.
Wall Mount Battery vs. Server Rack Battery

더 깊이 다이빙하십시오: Weighing Your Battery Form Factor Options

Let’s compare these two popular approaches to battery storage:
Wall Mount Battery Systems (예를 들어, Tesla Powerwall, Enphase Encharge, sonnenCore, LG Energy Solution RESU Prime):

  • 장점:
    • 미학: Designed to be visually appealing, often with a sleek, modern look suitable for installation in garages, utility rooms, or sometimes even more visible home areas.
    • All-in-One (자주): Many models integrate the battery, 비엠에스, and sometimes even a hybrid inverter into a single enclosure, simplifying installation in some respects.
    • Brand Ecosystems: Can offer seamless integration if you’re already invested in a particular manufacturer’s solar or energy ecosystem.
    • Specific Capacity Points: Typically offered in set capacities (예를 들어, 5 kWh, 10 kWh, 13.5 kWh per unit), which can be paralleled for more storage.
  • 단점:
    • 확장성: While you can parallel units, scaling might be less granular or more expensive per kWh beyond a certain point compared to rack modules.
    • Proprietary Nature: Some systems may be designed to work best (or only) with specific inverters or software from the same manufacturer, potentially limiting future flexibility.
    • 비용: Can sometimes have a higher cost per kWh, especially if you need substantial capacity, due to the integrated design and branding.
    • Repairability: An issue with one component in an all-in-one unit might be more complex to service.

Server Rack Battery Systems (예를 들어, LFP modules from Pylontech, EG4, Fortress Power, 그로와트, 등., installed in a rack/cabinet):

  • 장점:
    • High Modularity & 확장성: Extremely easy to scale up capacity by adding more individual (often ~5kWh) modules in parallel. This offers very granular control over system size.
    • Cost-Effectiveness for Larger Systems: For larger kWh needs, building a system with multiple rack modules can often be more cost-effective per kWh.
    • 유연성 & Openness: Many LFP rack batteries are designed to communicate with a wide range of third-party hybrid inverters using open protocols (캔 버스 또는 RS485처럼), giving you more choice.
    • High Density: Excellent energy storage density within a standard rack footprint.
    • Serviceability: If one module has an issue, it can often be isolated or replaced without taking the entire system offline (depending on design).
  • 단점:
    • Aesthetics/Space: Requires a dedicated rack or cabinet, which might not be as visually appealing as a sleek wall unit for some homeowners and takes up floor space (though it’s compact).
    • Component Integration: 너 (or your installer, like Gycx Solar) are responsible for ensuring proper integration of the batteries, BMS communication, 인버터, and any necessary enclosures and cabling, though many components are designed for easy pairing.

Gycx Solar story: "We often discuss this with clients. For Mrs. Jones, who wanted a clean look in her garage and about 10kWh of backup, a particular wall-mount unit was perfect. For Mr. Chen, who had an off-grid workshop with plans to expand his solar and needed 30kWh+ with room to grow, a system built with scalable LFP server rack batteries in a cabinet offered the best long-term flexibility and value.
It’s all about matching the solution to the need."


Understanding how rack mount systems function – their standardization, benefits like organization and space efficiency, and the principles of proper setup – is key to appreciating their role in modern IT and energy storage. 에너지 저장에 관해서는, both dedicated wall mount batteries and versatile server rack batteries offer excellent solutions.
Gycx Solar에서, we have the expertise to design and install robust energy storage solutions using either approach, always ensuring a safe, 효율적인, and well-organized system. If you’re exploring rack mount batteries or comparing different storage form factors, reach out to us. We’re here to help you power your needs effectively.


  1. UPS에 대해 배우십시오, 배터리 관련 용어, 리튬 배터리와 관련된 데이터 개념에 대한 더 나은 비교 이해를 위해. 이것은 당신의 요구에 더 잘 맞는 제품을 선택하는 데 도움이 될 것입니다..

답장을 남겨주세요

귀하의 이메일 주소는 공개되지 않습니다. 필요 입력 사항은 표시되어 있습니다 *